


✂️ What Do I Need for a Haircut at Home?
A Complete Step-by-Step Guide to DIY Haircuts (Without a Hair Disaster)
💇 Why Cut Hair at Home in the First Place?
Let’s be real — haircuts aren’t cheap. A simple trim can cost $30 to $80 (or more), especially if you’re visiting a high-end salon. Multiply that by several visits a year, and the expenses pile up quickly.
So whether you’re:
- Trying to save money
- Avoiding busy salons
- Looking to maintain your style between cuts
- Exploring a new DIY lifestyle
- Or just want more control over your look…
Cutting your own hair (or a family member’s) at home is more possible — and more rewarding — than you might think.
But it all starts with one smart question:
“What exactly do I need to cut hair at home?”
Spoiler alert: You don’t need a salon chair or diploma in cosmetology.
You just need the right tools, the right space, and the right plan.
🧰 Essential Tools for a DIY Haircut
✂️ 1. Professional Haircutting Shears (Not Kitchen Scissors)
Why: Sharp shears cut cleanly, preventing split ends and jagged cuts.
Look for:
- 5.5″ to 6.5″ stainless steel shears
- Ergonomic grip for control
- Adjustable tension screw
🚫 Avoid: Office or kitchen scissors — they’re too dull and can damage hair.
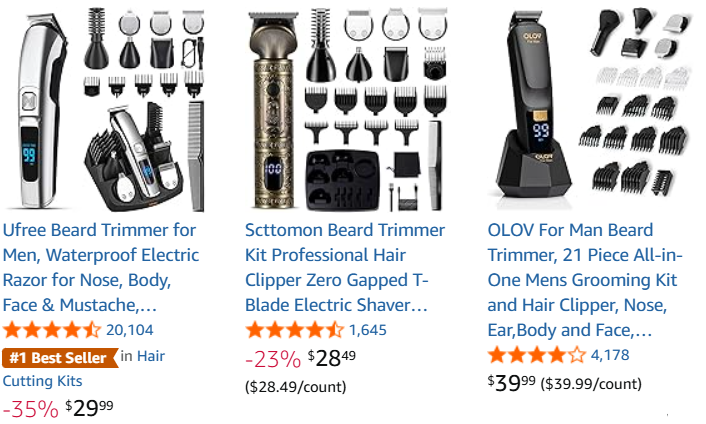
💇♂️ 2. Hair Clippers (for Short Cuts, Buzz Cuts, and Fades)
Ideal for: Men’s styles, undercuts, fades, and one-length trims
Look for:
- Multiple guards (#1 to #8)
- Cordless for flexibility
- Easy-to-clean blades
Pro tip: Practice blending using longer guards first, then go shorter as you build confidence.
🪮 3. Fine-Tooth Comb and Sectioning Clips
Why: These help with:
- Creating clean partings
- Sectioning hair for layering or even cuts
- Controlling thick or long hair
Optional but helpful: A wide-tooth comb for curly/wavy hair, and duckbill clips for sectioning.
💦 4. Water Spray Bottle
Why: Wetting the hair helps:
- Control flyaways
- Get cleaner cuts
- Achieve symmetry more easily
Spritz lightly — don’t soak — unless you’re doing a blunt wet cut.
👘 5. Haircutting Cape or Large Towel
Why: You’ll thank yourself during cleanup.
- A haircutting cape keeps hair off your clothes and floor.
- A towel draped around your shoulders works too (use a clip to secure it).
🪞 6. A Two-Mirror Setup
You’ll need:
- A wall mirror (front view)
- A handheld or standing mirror (to see the back)
If cutting your own hair: Consider a 3-way mirror or record yourself using your phone so you can check your angles afterward.
💡 7. Good Lighting and a Stable Chair
Location matters. Choose a space with:
- Natural lighting (if possible)
- White or LED lighting if indoors
- A sturdy chair (avoid rotating stools or anything unstable)
Avoid carpets — hair will cling and cleanup will be messy.
🧹 8. Cleanup Tools
Hair travels. Fast. Be prepared.
- Vacuum or broom
- Lint roller
- Trash bag for cut hair
- Towel under your feet to catch fallout
💡 Optional Extras to Make Life Easier
- Trimmer or edger: For detailing necklines, sideburns, or beard lines
- Texturizing/thinning shears: To remove bulk and blend layers
- Hair razor: For soft, wispy ends or feathered styles
- Hair clips: Especially useful for thick or curly hair
- Alcohol wipes: For sanitizing tools before/after
🔄 What Type of Haircut Are You Doing?
👩 For Women:
- Basic trim: Start with damp hair, part in sections, and trim ½ inch at a time.
- Layers: Use the ponytail method or the “unicorn” cut (search tutorials).
- Bangs: Cut dry for accuracy. Use the point-cutting method (vertical snips).
- Split end trim: Twist hair sections and snip ends that stick out.
👨 For Men:
- Buzz cut: Use a #2–#4 guard all over. Move against the grain.
- Fade: Start longer at the top and gradually go shorter. Use different guards.
- Scissor trim: Use the comb-over-finger technique for side and top blending.
👧 For Kids:
- Keep them calm with music or cartoons.
- Use blunt cutting for simplicity.
- Always go slower than you think you need to.
🎬 Watch Before You Cut: Recommended Video Resources
For Women’s DIY Haircuts:
- Brad Mondo on YouTube (fun + informative)
- “How to Cut Your Own Layers at Home” by Sarah Angius
- “DIY Bang Trim Tutorial” by Kayley Melissa
For Men’s Cuts:
- Alpha M. or Alex Costa for clippers and style tutorials
- Wahl’s official channel for fade guides
🧼 Post-Haircut: How to Clean and Care for Tools
After every cut:
- Rinse scissors, combs, and clips in warm soapy water.
- Dry thoroughly — moisture dulls blades.
- Sanitize with alcohol wipes or a disinfectant spray.
- Oil your clipper blades (if using) according to brand instructions.
- Store in a dry, clean pouch or drawer.
✅ Quick Pre-Cut Checklist
- I have all my tools within reach
- I’ve chosen a well-lit, non-carpeted area
- My hair is clean, damp (or dry for curls/bangs)
- I’ve decided on the haircut and watched a tutorial
- I’ve set realistic expectations for my skill level
✨ Final Thoughts: You Got This
Cutting your hair at home doesn’t have to be scary — it can be empowering, cost-saving, and even fun when you go in with a plan.
Start small. Learn the basics. Practice on simple trims before trying complex layers or fades. The best part? Hair grows back.
So grab your scissors, take a deep breath, and give yourself (or someone you love) a clean, confident cut — right in your own home.